How to Replace Mk4 GHD Cable
This article is from ghd-repair.co.uk which is about how to Replace Mk4 GHD Cable.GHD Cable replacement is slightly more complicated on the GHD 4.0B, 4.1B etc than it is on 3.1b’s, however it’s still fairly easy. In some variants of GHD 4.2 the cable socket will be slightly different to the one shown below. The method for this variant is the same, however you’ll need a different cable.For ghd mk4 styler.
1) Remove the Hinge Caps
Carefully use a screw driver to pop the caps off. They are held in place by a clip at 12 o’clock and 6 o’clock (when the ghd logo is rotated as below)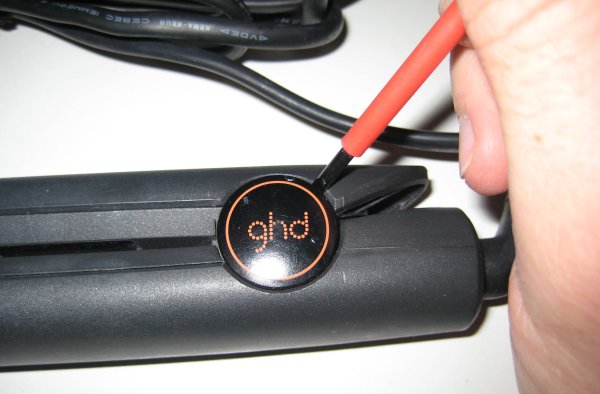
This will reveal a philips head screw on both sides:

2) Undo the hinge pin
It may not look the most elegant, however I’ve come to the conclusion that the easiest way to remove the hinge pin is to put the GHD’s between your legs, and then undo the screws with a screw driver in each hand. Make sure you use the correct size screw driver, as this screw is often very tight. It undoes anti-clockwise (as a normal screw thread). If you twist hard enough, you’ll hear a crack, and then it’ll come undone easily.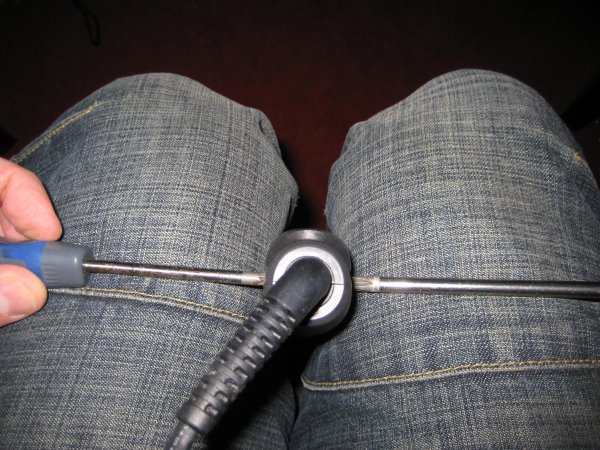
3) Push the hinge pin out
The screw will come off on one side, and then use a screw driver to push the pin out.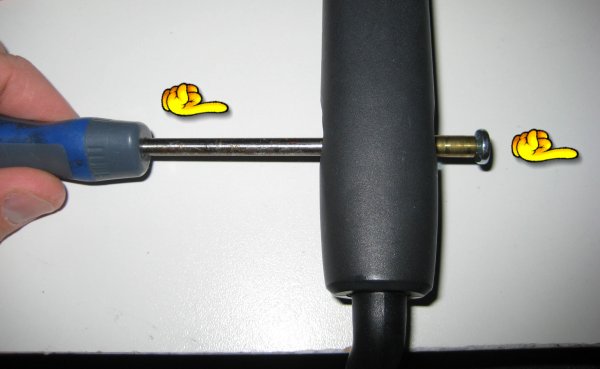
4) Seperate the two arms
Just take care with the wires that go around the hinge. You may find it easier to take the spring out at this stage, as has been done in the following photo.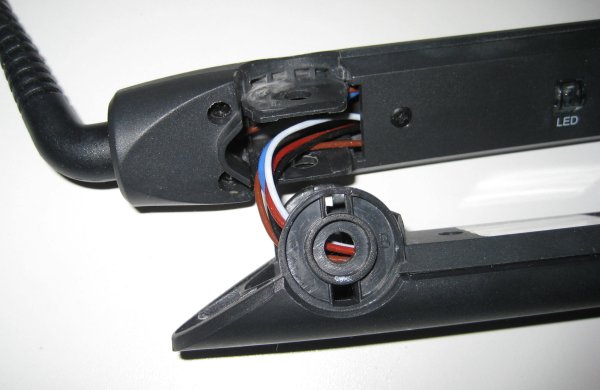
5) Using a small cross head screw driver, undo these two screws:
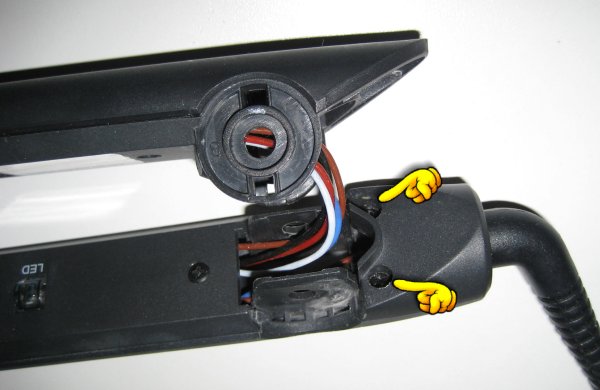
6) Remove Cable Connector Cover
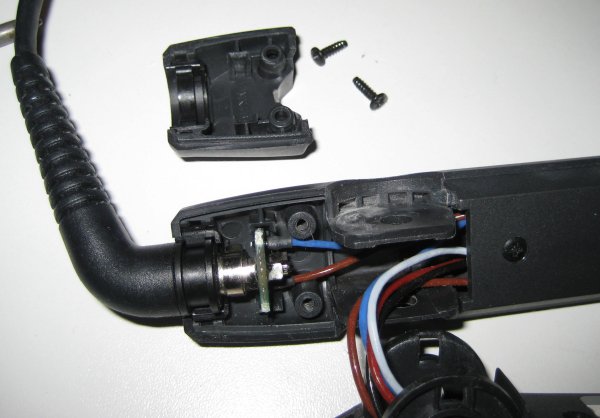
7) Remove the old cable
This will just pull out of the socket.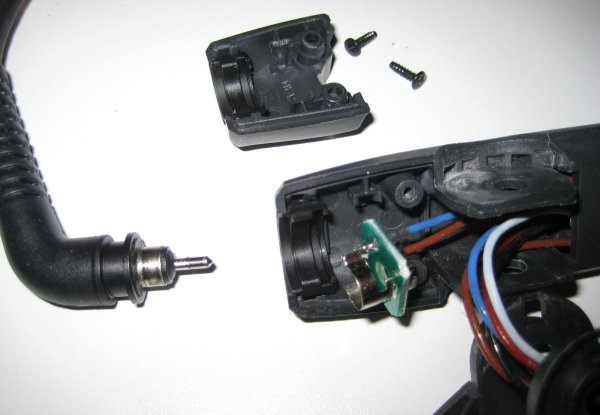
You can now fit the new cable. If you have some contact grease, then I’d suggest putting a little bit on the contact surfaces to improve the cable’s life. This isn’t essential however.
7) Put it back together!
Now just put the lid back on, screw it down and put the two arms back together. Here are a few tips when doing this:- Take care not to catch the wires that go between arms of the GHD’s. They should go the “long way round” the spring.
- Use a screw driver to line up all the components of the hinge. Once they are visually all lined up, then insert the hinge pin.
- If things aren’t quite lined up when you put the hinge pin in, then use a cross head screw driver to wobble the hinge pin slightly from the female thread side (whilst pushing on the screw head).
Move the european to UK adapter to the new cable
The adapter comes off the old cable by loosening the cross head screw. The european plug then pulls out and you can plug the new cable in and tighten the screw back up.
Alternatively, some adapter plugs have a top which hinges open to reveal the european plug – again just undo the screw and the lid will open.
Stay connected with straightenerblog.info, we will share you more ghd repairs info here.
And if you want to buy a new pair of ghd stylers,come to our chi-sell.com.Now the midnight ghd and gold ghd are on sale with 70% off,fast and free delivery!


没有评论:
发表评论